How to Export References from Google Scholar to EndNote (A Quick Guide)
For researchers and students, Google Scholar is an indispensable tool for discovering academic literature, while EndNote is a gold-standard for managing references and bibliographies. Manually re-typing citation information is not only tedious but also a common source of errors.
Fortunately, Google Scholar provides a simple, built-in feature to export citations directly into EndNote. This guide will show you three easy methods to streamline your research workflow, from a single citation export to a powerful one-click setup.
Method 1: Exporting a Single Reference (The Standard Way)
This is the most common and direct method when you find a specific article you need to cite.
-
Search on Google Scholar: Go to Google Scholar and perform your search to find the desired article, book, or paper.
-
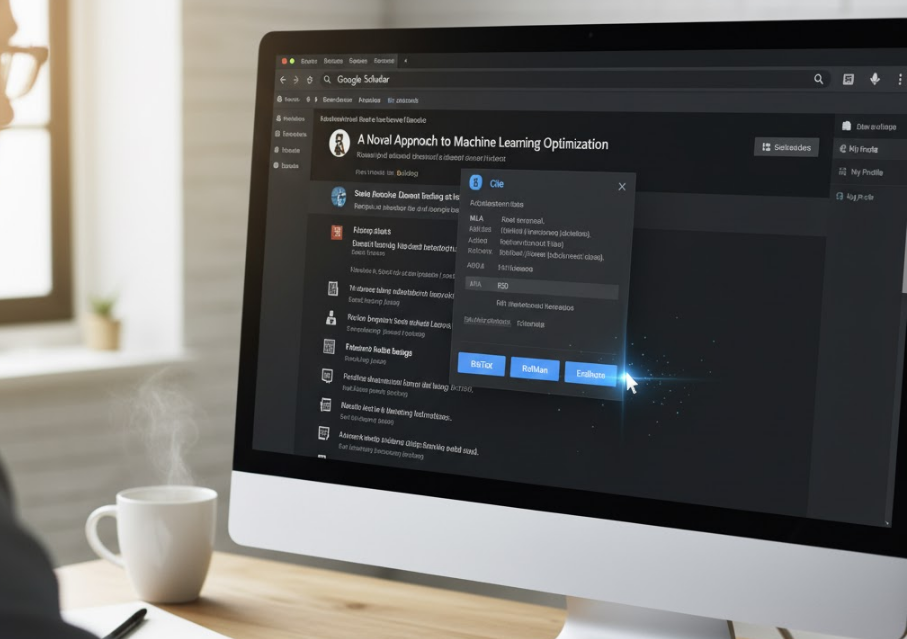
Click the "Cite" Button: Underneath the search result, you will see several links. Click the "Cite" icon, which looks like a quotation mark (").
-
Select "EndNote": A "Cite" pop-up window will appear, showing the citation in various formats (MLA, APA, etc.). At the bottom of this window, you will see links to import into bibliography managers.
-
Click "EndNote".
-
Download and Open: Your browser will download a file with a
.enwextension (e.g.,scholar.enw). Simply double-click this file. EndNote will automatically launch (if it's not already open) and import the reference directly into your library.
Method 2: The "Pro-Tip" – Set Up One-Click EndNote Exports
If you use EndNote as your primary reference manager, you can change your Google Scholar settings to make this process even faster. This will add a direct "Import into EndNote" link under every search result, removing the need to click "Cite" first.
-
Go to Scholar Settings: On the Google Scholar homepage, click the menu icon (☰) in the top-left corner and select "Settings."
-
Find Bibliography Manager: In the "Search results" section (which is usually the default page), scroll down to the "Bibliography manager" option.
-
Change the Setting: By default, it's set to "Don't show any citation import links." Select the radio button for "Show links to import citations into" and choose "EndNote" from the dropdown menu.
-
Click "Save."
Now, when you return to your search results, you will see a direct "Import into EndNote" link under every article. One click is all it takes.
Method 3: Exporting Multiple References at Once (Using "My Library")
If you are gathering many sources at once, exporting them one-by-one is inefficient. Use the "My Library" feature instead.
-
Save Articles: As you search, click the "Save" (star) icon under each article you want to keep. This adds them to your personal library.
-
Go to "My Library": Click the "My Library" link in the top-right corner of the Google Scholar page.
-
Select References: In your library, check the boxes next to all the references you wish to export. You can also select all articles on the page by clicking the master checkbox at the top.
-
Click "Export": With your references selected, click the "Export" button (which looks like an upward-facing arrow) at the top of the list.
-
Choose "EndNote": A pop-up will ask for the format. Select "EndNote". A single
.enwfile containing all your selected citations will be downloaded, allowing you to import them into EndNote in one batch.
Conclusion
Connecting Google Scholar to EndNote is a simple skill that can save you hours of work and ensure your bibliographies are accurate. Whether you use the single "Cite" link or set up the one-click "Import into EndNote" feature, mastering this process is a vital step in becoming a more efficient and organized researcher.